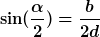
This article extends the manual of our app Stereo Mic Position Calculator.
Music, nowadays, is recorded in stereo (at least) to reproduce the positions of the different players. This way the music will be more transparent to the listener, giving them a better overall experience.
To create this spatial acoustic image, the sound waves need to reach the listener‘s ears at distinct times, and varying sound levels. Also, the listener’s head will filter out some frequencies before the sound reaches the far ear.
In modern music, instruments are usually close-miked, and spatial distribution is done in the mixing board, with the panorama knob. However, this only provides a difference in sound level, but not in time. The acoustic space created will therefore sound artificial. Think listening to music through several holes in a wall. (Compare this to a monaural recording—which sounds like listening to music through one hole in the wall.)
It‘s definitely better to capture the space with two mics, feeding them to the left and right stereo channels appropriately. Choose one of the following three microphone setups to satisfy your aesthetical requirements, soundwise:
Preliminary considerations
Our goal is to represent the ensemble (the choir, the orchestra, the band) in their whole extent from left to right. So we have to take the imaging angle of our microphone setup into consideration. If it is too large, the musicians will appear crowded in the center of our stereo recording. If it is too small, the musicians’ position will drift to the sides of the “stage”, i. e., towards the speakers (see image). You’ll want to avoid both.
Alas, setting up the microphones the proper way is fairly counter-intuitive. You can’t easily guess the right values, as it involves complex math. The angle is calculated from the width of the ensemble, and the distance between their front line and the mics. The outermost points of the ensemble and the mic position form a triangle observing the adjacent formula.
Luckily, there’s an app to take care of the math: My Stereo Mic Positioning Calculator for iOS.
Here are the three stereo microphone setups used most often:
Time-of-arrival stereophony (AB-Technique)
Mount two omnidirectional microphones, a certain distance away from another, facing the ensemble.
Depending on the sound source, a latency smaller than 1.5 ms might suffice. There’s a preference setting in the Stereo Mic Positioning Calculator app where you can adjust this value. Look for AB Latency.
Due to the mics’ distance, sound coming from the sides will reach the two mics at different times. This delay is called latency. It has been empirically established that a latency of 1.5 milliseconds will make you perceive the sound source “fully left”, or “fully right”.
Practical example
Given a choir with a width of 5 meters, and mics set up 3 meters in front of the choir. The app computes a microphone base of 79.9 centimeters which equals 0.799 meters.
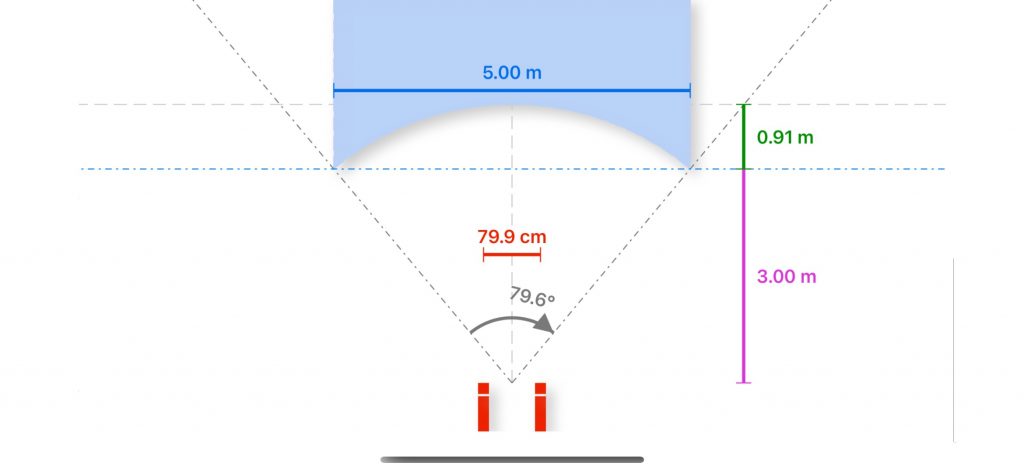
The sketch indicates that it makes sense to position the ensemble in a circle segment, the mics being the center of the circle. This way, all instruments are the same distance from the mics.
Effect
Since the direction of the sound which hits a single microphone is irrelevant with AB, you can use omnidirectional mics. They lack the proximity effect of other mics, and will record even low frequencies cleanly and evenly. Omnidirectional mics capture a lot of the room’s acoustics, which can be a good thing, depending on your situation. AB yields a pleasing stereo sound, however, the location of single instruments can be washy.
The latency can cause phase artifacts. You need to verify mono compatibility.
Intensity stereophony (XY-Technique)
Two cardoid mics are placed at a certain angle, in such a way that the center of one mic’s membrane is exactly on top of the other. The sound waves will hit both mics at exactly the same time — no phase problems (as opposed to the AB-technique, see above). You can locate the position of your various sound sources only, because the mics will pick up sounds from different directions at different levels.
Practical example
Given the same scenario as above, the app computes a base (microphone) angle of 138.9°.
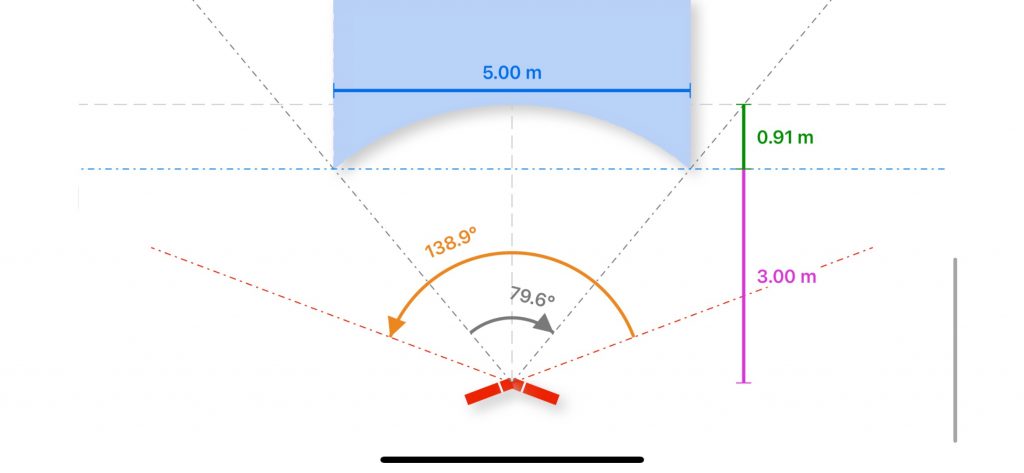
Of note, the base angle is not equal to the imaging angle. These are two distinct entities. They run in opposition: The smaller the base angle, the wider the imaging angle. (They meet at approx. 120°.)
Effect
No phase problems, naturally. Locating single players is easy, however, the sound will not “blend” as much, which can be disadvantageous. The stereo image will sound less natural.
Near-coincident stereophony (ORTF technique)
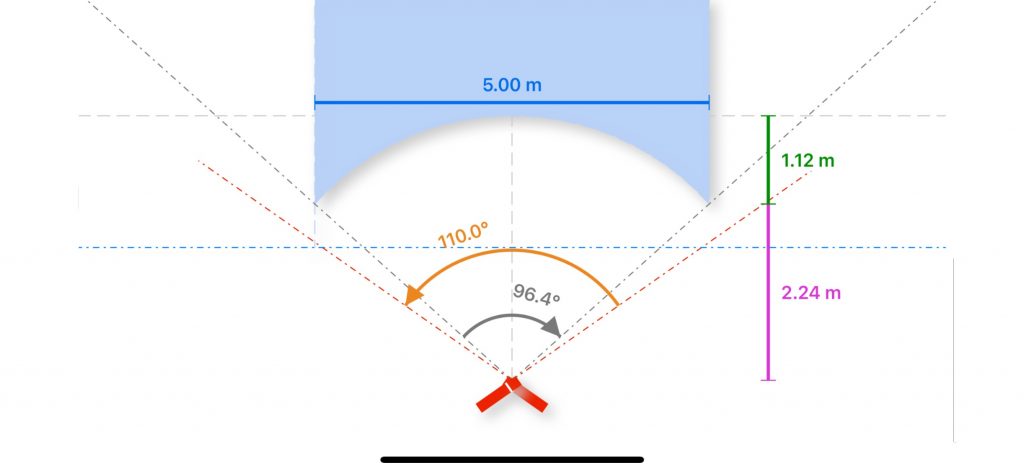
This is the “best of both worlds” technique. The cardoid mics are placed a small distance from each other, at a given base angle. Several flavours of this technique have been developed by European broadcasting corporations. Most popular is ORTF, developed by the French national TV Office de Radiodiffusion Télévision Française, with a microphone base of 17 centimetres and a base angle of 110°.
Practical example
For our ensemble width of 5 meters, the app computes a microphone distance of 2.24 meters. Since the imaging angle is constant, you cannot choose the distance of the microphones. The distance is a function of the ensemble’s width.
Effect
ORTF technique gives you a better sounding room than XY, and a better location tracking than AB. It is the recommended procedure in many situations.
There is one disadvantage: With other techniques like AB or XY, you can change the amount of natural reverb by moving the mics further away from the ensemble. You cannot do that with ORTF, because you’re not allowed to change the distance of the microphone setup relative to the ensemble.